PX4 HITL
PX4+Gazebo Hardware-in-the-Loop Simulation HITL
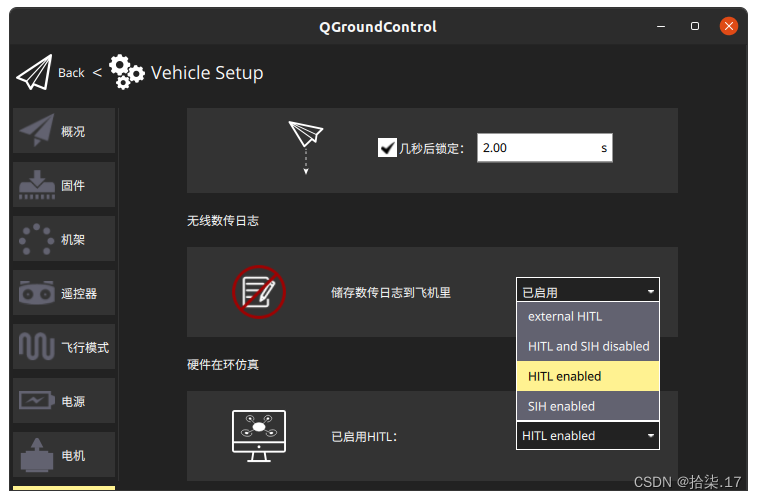
1. Connect the flight controller to the computer via USB, open QGC, and select Vehicle Setup -> Security -> Hardware-in-the-Loop Simulation -> HILT enable.
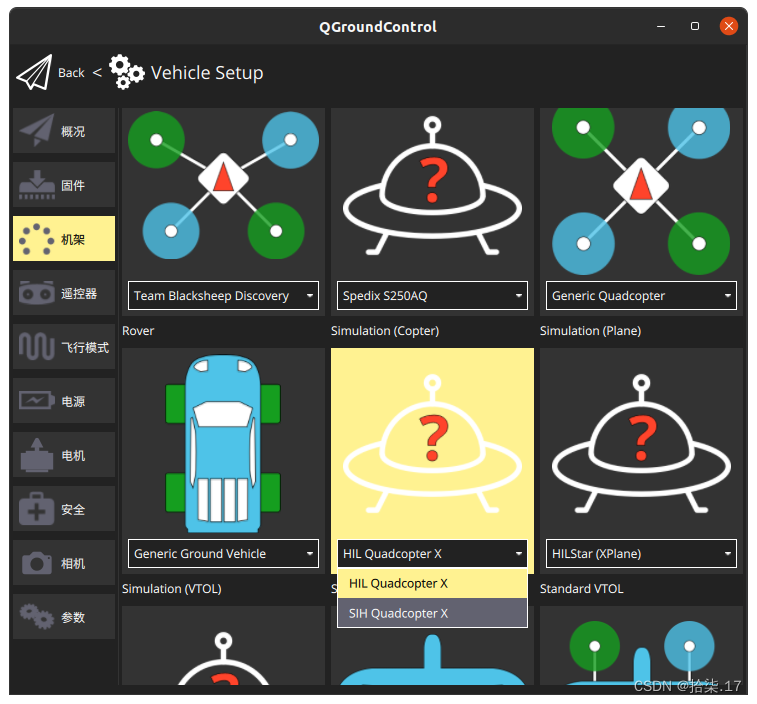
2. Select Vehicle Setup -> Airframe -> HILT Quadcopter X (you will need to restart the flight controller for this to take effect).
3. Calibrate the RC remote control (if you don’t have one, you can skip this step).
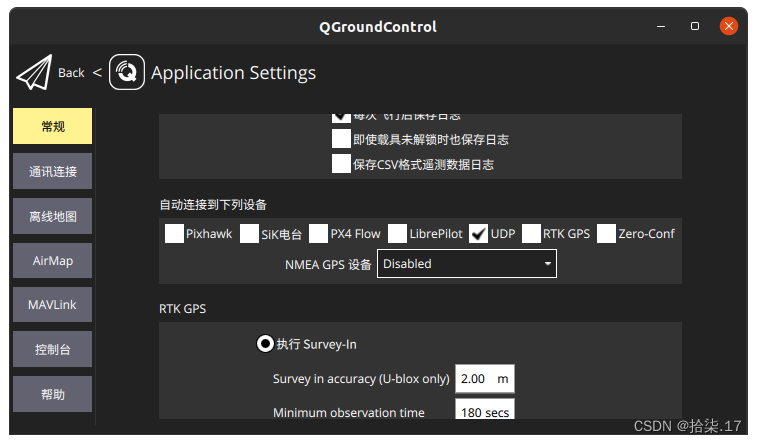
4. Open Application Settings -> General and keep only UDP in the connection options as shown below.
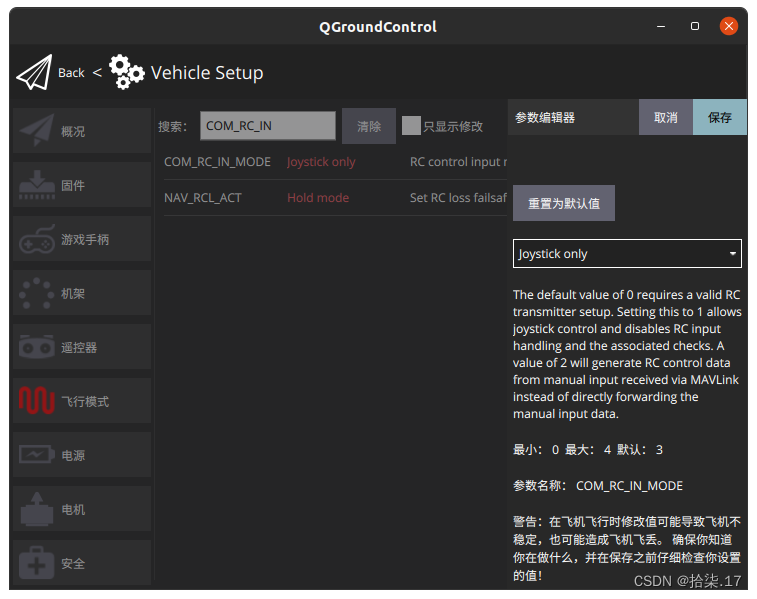
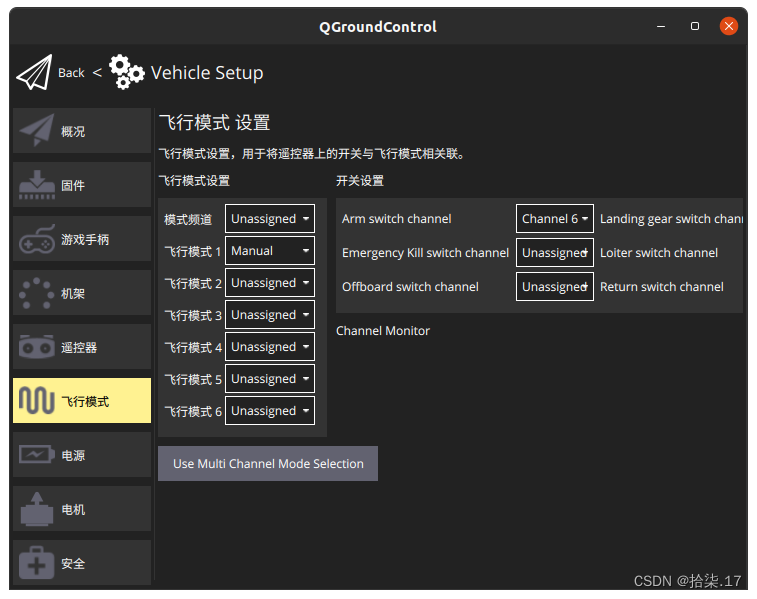
5. Select Vehicle Setup -> Parameters and change the parameter COM_RC_IN_MODE. This parameter determines the remote control signal input mode. Since I am using a virtual remote control, I selected Joystick only. (The official website prompts you to select "Joystick/No RC Checks", but this option is not available in v1.13.3.) After changing this, the red warning prompt will no longer appear on the "Flight Mode" setting interface, and you can specify different flight modes for each channel.
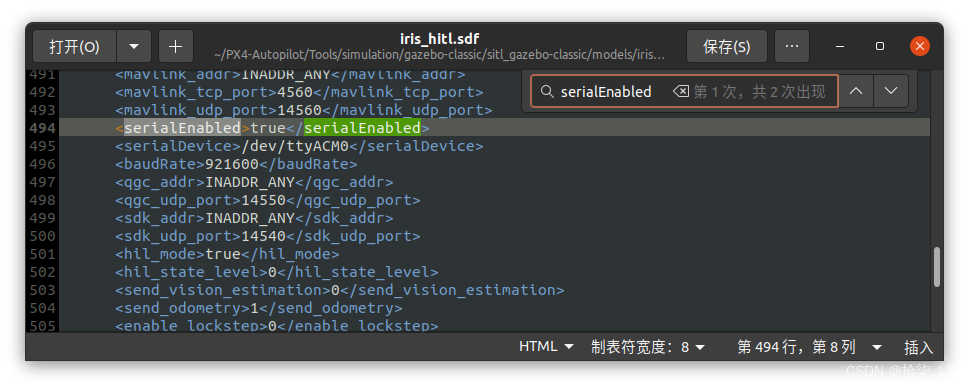
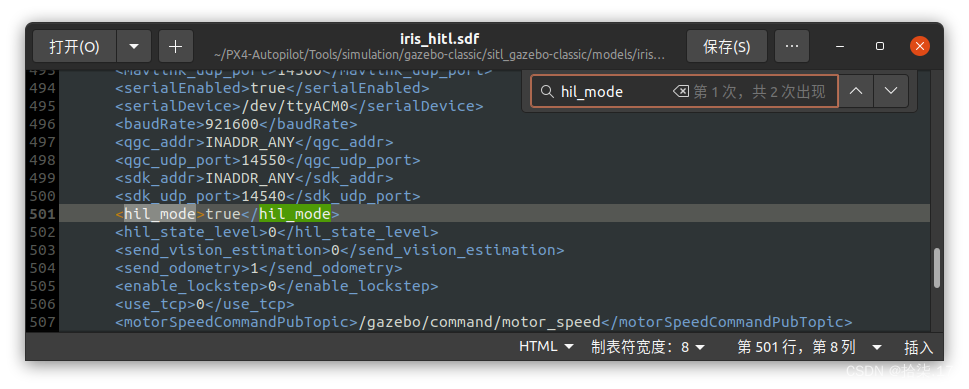
6. Modify iris_hitl.sdf, find the tag of the file mavlink_interface plugin, and change the serialEnabled and hil_mode parameters to true.
roscd px4

DONT_RUN=1 make px4_sitl_default gazebo-classic
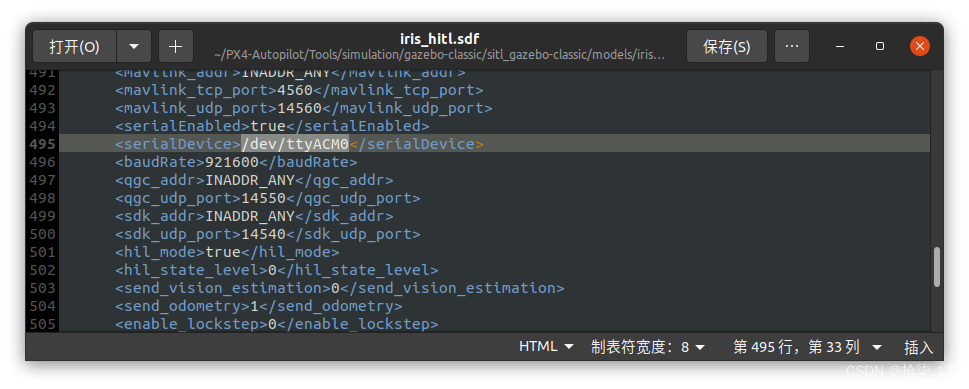
7. Check whether the USB port name assigned to the flight controller by the computer is correct. The iris_hitl.sdf file uses /dev/ttyACM0 by default. If it is not this port, please change it to the corresponding one.
 8.source configure environment variables and run the simulation.
source Tools/simulation/gazebo-classic/setup_gazebo.bash $(pwd) $(pwd)/build/px4_sitl_default

gazebo Tools/simulation/gazebo-classic/sitl_gazebo-classic/worlds/hitl_iris.world
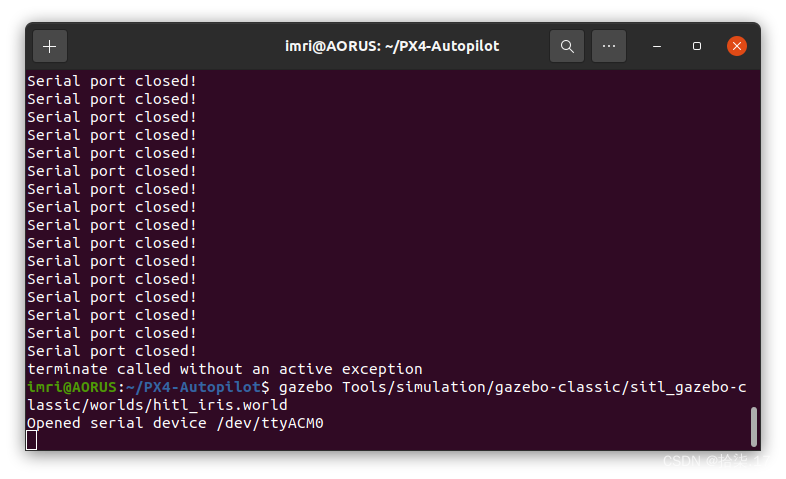
Note: If the message "Serial port closed" appears, it is usually because QGC is not closed. You should close QGC first, run the two commands in 8, and then open QGC again.
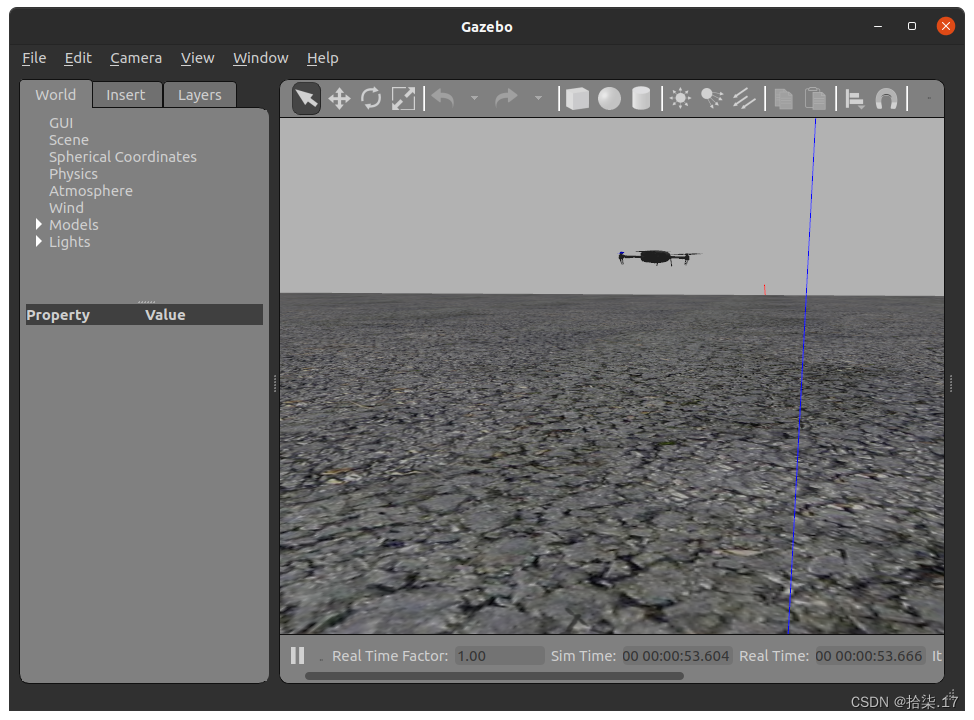
9. The ground station is unlocked and the plane takes off successfully!

More information
Reference link: https://shiqi.blog.csdn.net/article/details/137450308